
A license plate on a Hyundai Elantra is a vehicle identification tag affixed to the front or rear of the car. It displays a unique combination of numbers and letters assigned by the government to identify the vehicle for registration, taxation, and law enforcement purposes.
Discover the hassle-free way to install a front license plate on your Hyundai Elantra effortlessly. Follow these simple steps and ensure your car complies with regulations while maintaining its sleek look. Say goodbye to mounting concerns – learn the perfect technique to secure your license plate today!
Installing a front license plate on a Hyundai Elantra involves using the designated mounting holes on the bumper. Typically, it requires screws or bolts to securely attach the plate. Follow the car’s manual or use a screwdriver to complete the straightforward installation process.
How To Install Front License Plate On Hyundai Elantra
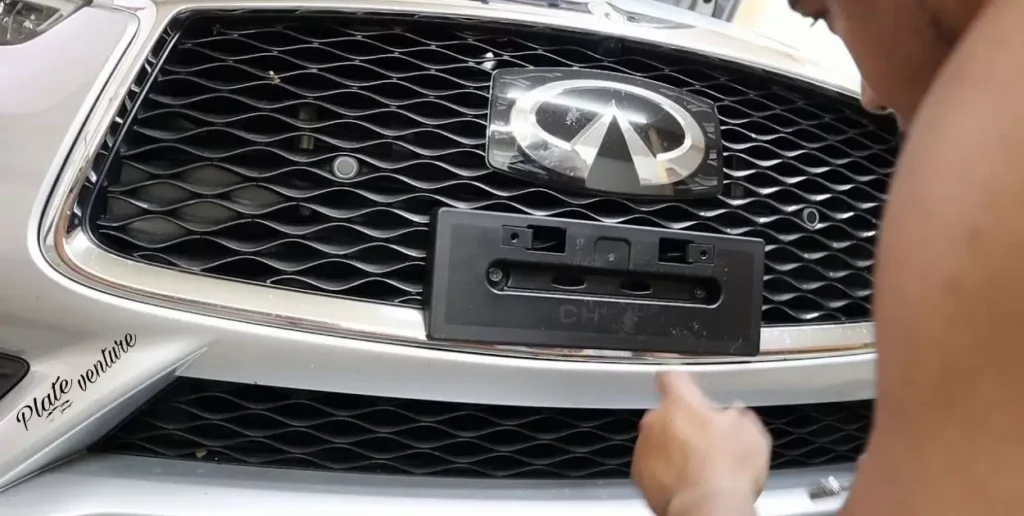
Installing a front license plate on a Hyundai Elantra is simple. First, gather the necessary tools: a screwdriver and the provided mounting hardware. Locate the pre-drilled holes on the car’s front bumper, aligning them with the holes on the license plate bracket.
Next, use the screwdriver to secure the plate to the bumper, tightening the screws firmly. Ensure the plate sits flush and doesn’t obstruct any lights or sensors. Once attached, double-check the stability before hitting the road. Following these steps guarantees a hassle-free installation of your front license plate on a Hyundai Elantra.
Gather Necessary Tools and Materials
To get started on making a license plate, gather the tools and materials you need. Grab a metal plate, paint, paintbrushes, stencils, and screws. You will also need a hammer, drill, and safety goggles for the process.
Prepare the work area by laying out the materials. Clean the metal plate thoroughly and dry it before painting. Use the stencils to outline the letters and numbers of your license plate design. Paint the characters and allow them to dry completely. Finally, drill holes for the screws and attach the plate securely.
Locate the Front License Plate Bracket
To find the front license plate bracket, start by examining the lower part of your car’s front bumper. Look for small holes or indents that match the shape of a bracket. Once located, use a screwdriver or appropriate tool to secure the bracket in place. Remember to consult your vehicle’s manual for specific instructions.
Another method is to check behind the front grille or within the wheel well area. Sometimes, the bracket might be hidden behind these parts. Use a flashlight to aid your search, and once found, attach the license plate securely onto the bracket using screws or bolts. Always ensure the bracket is aligned properly for a secure fit.
Positioning the License Plate Bracket
The license plate bracket’s positioning is crucial for proper installation. You should align it carefully to fit the vehicle’s specifications. Placing the bracket securely ensures the license plate stays in place and visible.
Firstly, check the vehicle’s manual for specific instructions on bracket placement. Then, using the provided hardware, firmly attach the bracket to the designated area on the vehicle. Proper positioning guarantees compliance with legal requirements and prevents any issues with visibility or stability.
Preparing Mounting Holes
To prepare the mounting holes for your license plate, gather a drill, appropriate drill bit, and measuring tape. Measure the distance between the holes on your plate and mark these measurements on the vehicle’s bumper or license plate bracket using a marker.
Next, carefully drill holes at the marked spots using the drill and the correct-sized bit. Ensure the holes are aligned properly to securely attach the license plate. Finally, attach the plate using screws or bolts, tightening them to keep the plate firmly in place. Turn On License Plate Light. Remember to double-check local regulations for proper placement before drilling.”
Selecting Proper Screws or Fasteners
Choosing the right screws for a license plate is crucial. Look for screws that match the plate’s holes in size and thread type. Stainless steel screws work well, resisting rust and corrosion, ideal for outdoor conditions.
Consider the head type too—flat or round heads fit best. Use a screwdriver or drill to secure the plate firmly. Remember, choosing the proper screws ensures a secure and lasting attachment for your license plate. Always check local regulations for any specific requirements regarding license plate fasteners.
When selecting screws for your license plate, prioritize compatibility. Ensure the screws match the plate’s holes and consider materials like stainless steel for durability. Properly securing the plate with the right screws guarantees stability and compliance with local laws, giving you peace of mind on the road.
Attaching The Bracket To The Car
To fix the bracket to your car’s license plate, grab the screws and a screwdriver. Position the bracket over the plate’s designated area on your vehicle’s bumper. Use the screws and screwdriver to secure the bracket firmly in place.
Next, ensure the license plate is aligned correctly within the bracket. Adjust it if needed to make sure it sits evenly. Finally, tighten the screws to secure the plate tightly to the bracket. Double-check the attachment to ensure it’s stable and won’t loosen while driving.
Aligning the License Plate

Aligning the license plate is simple. Use a level surface to position it straight. Ensure it’s centered and securely attach it. This ensures it’s visible and abides by regulations.
Proper alignment matters. It prevents issues with readability. A straight license plate enhances your vehicle’s appearance. Regular checks maintain its alignment.
Marking Drill Points
To mark drill points on a license plate, use a ruler and a marker. Measure and mark the spots where the holes should go. Make sure the markings are accurate before drilling.
Accuracy matters when marking drill points. A ruler helps measure the distances precisely. Mark the spots clearly before starting to drill.
Drilling Holes for Installation
When you install a license plate, drilling holes is necessary. The holes let you attach the plate securely. You use a drill to make the holes in the designated spots. Then, you insert screws to fix the plate in place.
Drilling holes for a license plate ensures a stable attachment. You position the plate and mark the spots for drilling. After drilling, you affix the plate firmly with screws. This simple process secures your license plate properly.
Securing the License Plate Bracket
Securing the license plate bracket is crucial for keeping your plate in place. Use screws or bolts to attach the bracket firmly to the vehicle. Check the tightness regularly to prevent any loosening due to vibrations or movement.
Ensure the bracket aligns properly with the designated slots on the vehicle’s bumper. Position it securely before fastening the screws or bolts. A secure license plate bracket not only follows regulations but also prevents any loss or damage to your license plate while driving.
Checking for Proper Alignment
To check if your license plate is aligned properly, stand directly in front of your vehicle. Look to see if the plate sits evenly between the two sides. Ensure it’s not tilted or off-center. Adjust it if needed by loosening the screws, repositioning the plate, and tightening them again.
A properly aligned license plate enhances visibility and ensures compliance with regulations. Misaligned plates might obstruct the view or violate road rules. Regularly inspecting and correcting alignment avoids potential fines and maintains safety on the road.
Installing License Plate Frame (Optional)
When adding a license plate frame, gather the tools needed: a screwdriver and screws. First, position the frame over the plate, aligning the holes. Then, use the screwdriver to firmly attach the frame with the screws. This step enhances the car’s appearance and can be personalized to match your style.
This step is optional but adds a touch of personalization. It’s a simple process: align, screw in place, and enjoy the refreshed look. Choose a frame that complements your vehicle, making it uniquely yours while ensuring it complies with local regulations.
Adding Protective Padding
Protective padding for your license plate shields it from damage. This padding absorbs impacts, preventing scratches and dents. It secures easily onto your plate, providing extra defense.
You can install this padding quickly without tools. It safeguards your license plate from bumps and knocks. Upgrade your plate’s protection with this simple addition.
Tightening Screws or Fasteners
When securing a license plate, use a screwdriver to tighten the screws or fasteners. Insert the screws through the plate’s holes and into the designated spots on your vehicle. Make sure they’re snug to prevent the plate from wobbling or falling off.
Loose license plates can cause trouble on the road, so periodic checks to ensure the screws are tight are important. Keep a screwdriver handy for quick adjustments if needed. Remember, secure plates contribute to safer driving experiences for everyone.
Verifying Stability and Firmness
To verify a license plate’s stability and firmness, inspect its attachment to the vehicle. Check for any loose screws, bolts, or fasteners that might compromise its stability. Ensure it’s securely mounted without wobbling or shaking.
Examine the plate for any signs of damage, cracks, or wear that could affect its stability. Confirm that it’s firmly in place, displaying the registration details clearly without any obstruction. Regular checks maintain the plate’s stability, ensuring it remains securely attached and visible as required by regulations.
Adjusting for Symmetry
Adjusting for symmetry in a license plate involves positioning the characters to create a balanced appearance. Drivers can make subtle shifts to align letters and numbers evenly. This enhances the plate’s aesthetic appeal while maintaining its readability for automated systems and law enforcement.
By adjusting the placement, the license plate achieves a harmonious look. This process often involves minor tweaks to ensure a pleasing and symmetrical arrangement of characters, contributing to a more polished overall appearance.
Final Inspection of Installation

The final inspection ensures the installation is correct and complete. Inspectors verify the license plate’s proper attachment and alignment. They check for any potential issues or errors. This step ensures compliance with regulations and safety standards.
During the inspection, officials assess the license plate’s visibility and readability. They confirm it matches the vehicle’s registration. Inspectors ensure the plate is securely fastened and in the right position. This final check guarantees that the installation meets all necessary requirements before the vehicle hits the road.
Cleaning Up Excess Residue
Cleaning excess residue off a license plate is simple. Use a mild detergent and warm water. Scrub gently with a soft cloth to remove any dirt or grime. Dry it thoroughly to prevent water spots. This easy process keeps your license plate clean and legible.
For stubborn residue, try using vinegar or specialized cleaners. Apply them directly and let them sit for a few minutes before wiping. Remember to rinse well and dry completely. Regular cleaning maintains your plate’s visibility and keeps it looking neat.
Testing Plate Durability
To check plate durability, engineers conduct tests. They apply pressure and examine any changes. These tests reveal how well plates withstand stress.
During testing, scientists measure the plate’s resilience. They observe any cracks or breaks. This process helps determine the plate’s durability under different conditions.
Ensuring Compliance with Regulations
To ensure compliance with regulations, license plates must meet specific criteria. Vehicle owners need to follow state laws regarding plate design, size, and visibility. Compliance guarantees proper identification and aids law enforcement in tracking vehicles accurately.
Adherence to regulations helps maintain road safety and reduces potential fines or penalties. Regular checks and updates ensure that license plates remain in line with current standards. Compliance ultimately supports efficient vehicle identification and contributes to smoother traffic management.
Frequently Asked Question
How do you install a front plate?
To install a front plate, use screws to affix it to the designated area on the vehicle’s front bumper. Ensure it complies with local regulations for visibility and positioning.
How to install front license plate bracket on Hyundai Palisade?
To install a front license plate bracket on a Hyundai Palisade, first, gather the necessary tools and follow the vehicle’s manual instructions step-by-step for a secure attachment.
How do you remove a front plate holder?
To remove a front plate holder, use a screwdriver to unscrew the bolts holding it in place. Then, gently pull the holder away from the vehicle.
Is front license plate required in CA?
Yes, a front license plate is required in California for all vehicles. It’s mandated by state law to display both front and rear plates for identification purposes.
Conclusion
Installing a front license plate on a Hyundai Elantra is a straightforward process. By utilizing the designated mounting points on the vehicle’s front bumper, you can securely attach the plate. Following the manufacturer’s instructions and using appropriate tools ensures a proper and compliant installation for your Hyundai Elantra.
For a hassle-free procedure, align the license plate with the pre-drilled holes on the bumper, then use screws or bolts to affix it firmly. This straightforward method guarantees compliance with regulations while maintaining a neat appearance for your Hyundai Elantra’s front license plate.